

经历了长期铺垫,我们终于要进入 afl-fuzz.c 的阅读。在打开这长达 8198 行的文件之前,我们有必要回顾前几篇文章的内容:
AFL源码阅读(一):启程。在这篇文章里,我们看到 afl-gcc 是如何将一个程序插桩编译的。它调用下游编译器生成汇编代码,然后调用 afl-as 工具修改汇编。在目标程序各个基本块的入口点,会插入一小段桩代码;另外,在尾部插入一段比较长的 main payload。每一小片桩代码,都会有一个(在编译期决定的)随机的值代表其位置;若发生了 $A\to B$ 的跳转,则用 $(A>>1) \oplus B$ 作为这条边的 id,将 shm[(A>>1) ^ B] 加一。应当注意,$A\to B$ 的跳转是桩代码之间的跳转,与基本块之间的 jmp, je, jne 等跳转并不是严格一一对应的。尽管这两者经常能互相对应上,但并非所有的基本块入口都一定被插桩。在第三篇文章中,我们就会看到一个例子。
AFL源码阅读(二):Main Payload 汇编。此文详细阅读了刚刚提到的那几百行 main payload 汇编,分析了 fork server 的行为。程序运行到第一个基本块入口时,会停在此处,初始化共享内存,变成一个 fork server。它与 fuzzer 主进程通过 fd 198、199 通讯,接收 fuzzer 的指令。当需要运行目标程序时,它 fork 出一个子进程,由子进程继续执行目标程序的逻辑;子进程结束后,fork server 向 fuzzer 通报子进程的退出原因。得益于 copy-on-write 机制,fork server 相比于大量调用 execve 的方案,能有更高的性能。
AFL源码阅读(三):afl-tmin。这篇文章从 afl-tmin 工具着手,详细分析了 AFL 是如何利用 shm 信息的。需要注意,afl-tmin 并没有使用 fork server。shm 的大小为 65536 字节,很容易装进 L2 甚至 L1 缓存。为了避免 corpus 数量爆炸,hit count 会分进 9 个桶中。AFL 比较两次执行的路径时,不是直接逐字节比较 shm,而是比较 uint32 的 shm hash 值,以提升效率。
AFL源码阅读(四):两个工具。此文分析了 afl-showmap 和 afl-analyze 这两个程序。前者的功能是简单地输出分桶后的 hit count,后者的功能是猜测一份输入文件的各个字节的语义。它们与 afl-tmin 一样,不使用 fork server,只分析 shm 中记载的 hit count。
因此,现在我们十分了解 shm 中 hit count 的计数过程、了解 AFL 如何对 hit count 分桶和计算 hash;也了解 fork server 是如何运行的。不过,fork server 必须要有一个 supervisor。从 fork server 的汇编中可以看到,如果它向 fd 199 写四个字节失败了,它就会认为不存在 supervisor,于是不采用 fork server,而是直接执行目标程序逻辑。而当我们运行 afl-fuzz 时,fork server 就会被启用。
afl-fuzz.c 这份文件中,混杂了终端 UI、种子变异策略、队列维护、fork server 通讯等各种逻辑。因此,我们不打算在短短一篇文章中就介绍完这所有内容。本文将只关心 fuzz 正式开始之前的准备工作,即进入 fuzz 循环之前的流程。
强烈建议读者在阅读本文之前,先重温一遍 AFL 白皮书(这里有 x1do0 翻译的中文版)。若熟悉白皮书中的各种概念,阅读源码时当有如游旧径、如见故人之感。
我们今天阅读的函数如下:

main 函数
按照惯例,我们仍旧从 main 函数读起。运行过程可能需要调试,VS Code 的 launch.json 写法如下:
{
  "version": "0.2.0",
  "configurations": [
    {
      "name": "C/C++ Runner: Debug Session",
      "type": "cppdbg",
      "request": "launch",
      "args": ["-i", "corpus", "-o", "workdir", "--", "./app"],
      "environment": [
        {
          "name":"AFL_NO_UI",
          "value":"1"
        }
      ],
      "stopAtEntry": false,
      "externalConsole": false,
      "cwd": "/root/work/AFL-master/mytest",
      "program": "/root/work/AFL-master/afl-fuzz",
      "MIMode": "gdb",
      "miDebuggerPath": "gdb",
      "setupCommands": [
        {
          "description": "Enable pretty-printing for gdb",
          "text": "-enable-pretty-printing",
          "ignoreFailures": true
        }
      ]
    }
  ]
}
来看 main 函数的代码。首先是 argv 处理:
  s32 opt;
  u64 prev_queued = 0;
  u32 sync_interval_cnt = 0, seek_to;
  u8  *extras_dir = 0;
  u8  mem_limit_given = 0;
  u8  exit_1 = !!getenv("AFL_BENCH_JUST_ONE");
  char** use_argv;

  struct timeval tv;
  struct timezone tz;

  SAYF(cCYA "afl-fuzz " cBRI VERSION cRST " by <lcamtuf@google.com>\n");

  doc_path = access(DOC_PATH, F_OK) ? "docs" : DOC_PATH;

  gettimeofday(&tv, &tz);
  srandom(tv.tv_sec ^ tv.tv_usec ^ getpid());

  // argv 处理
  while ((opt = getopt(argc, argv, "+i:o:f:m:b:t:T:dnCB:S:M:x:QV")) > 0)

    switch (opt) {

      case 'i': /* input dir */
        // 初始 corpus 目录
        if (in_dir) FATAL("Multiple -i options not supported");
        in_dir = optarg;

        // 若使用 "-i -",则表示 in-place resume
        if (!strcmp(in_dir, "-")) in_place_resume = 1;

        break;

      case 'o': /* output dir */
        // 工作目录
        if (out_dir) FATAL("Multiple -o options not supported");
        out_dir = optarg;
        break;

      case 'M': { /* master sync ID */
          // -M xxx 表示以 master 身份运行程序
          u8* c;

          if (sync_id) FATAL("Multiple -S or -M options not supported");
          sync_id = ck_strdup(optarg);

          if ((c = strchr(sync_id, ':'))) {

            *c = 0;

            if (sscanf(c + 1, "%u/%u", &master_id, &master_max) != 2 ||
                !master_id || !master_max || master_id > master_max ||
                master_max > 1000000) FATAL("Bogus master ID passed to -M");

          }

          // master fuzzer 要执行 deterministic 变异
          force_deterministic = 1;
        }

        break;

      case 'S':
        // slave 身份
        if (sync_id) FATAL("Multiple -S or -M options not supported");
        sync_id = ck_strdup(optarg);
        break;

      case 'f': /* target file */
        // 假如目标程序是从某个固定的文件读入,则可以通过 -f 选项告知 afl-fuzz
        // afl-fuzz 会将变异出的 input 放进那个文件,然后执行目标程序
        if (out_file) FATAL("Multiple -f options not supported");
        out_file = optarg;
        break;

      case 'x': /* dictionary */
        // 导入 dictionary
        if (extras_dir) FATAL("Multiple -x options not supported");
        extras_dir = optarg;
        break;

      case 't': { /* timeout */
          // exec_tmout 限制,单位是毫秒
          u8 suffix = 0;

          if (timeout_given) FATAL("Multiple -t options not supported");

          if (sscanf(optarg, "%u%c", &exec_tmout, &suffix) < 1 ||
              optarg[0] == '-') FATAL("Bad syntax used for -t");

          if (exec_tmout < 5) FATAL("Dangerously low value of -t");

          if (suffix == '+') timeout_given = 2; else timeout_given = 1;

          break;
      }

      case 'm': { /* mem limit */
          // 内存限制
          u8 suffix = 'M';

          if (mem_limit_given) FATAL("Multiple -m options not supported");
          mem_limit_given = 1;

          if (!strcmp(optarg, "none")) {

            mem_limit = 0;
            break;

          }

          if (sscanf(optarg, "%llu%c", &mem_limit, &suffix) < 1 ||
              optarg[0] == '-') FATAL("Bad syntax used for -m");

          switch (suffix) {

            case 'T': mem_limit *= 1024 * 1024; break;
            case 'G': mem_limit *= 1024; break;
            case 'k': mem_limit /= 1024; break;
            case 'M': break;

            default:  FATAL("Unsupported suffix or bad syntax for -m");

          }

          if (mem_limit < 5) FATAL("Dangerously low value of -m");

          if (sizeof(rlim_t) == 4 && mem_limit > 2000)
            FATAL("Value of -m out of range on 32-bit systems");

        }

        break;

      case 'b': { /* bind CPU core */
          // 绑定特定 cpu 核
          if (cpu_to_bind_given) FATAL("Multiple -b options not supported");
          cpu_to_bind_given = 1;

          if (sscanf(optarg, "%u", &cpu_to_bind) < 1 ||
              optarg[0] == '-') FATAL("Bad syntax used for -b");

          break;

      }

      case 'd': /* skip deterministic */
        // -d 选项表示跳过 deterministic 阶段
        if (skip_deterministic) FATAL("Multiple -d options not supported");
        skip_deterministic = 1;
        use_splicing = 1;
        break;

      case 'B': /* load bitmap */
        // 秘密选项,只关心 shm 中特定的那些位置
        /* This is a secret undocumented option! It is useful if you find
           an interesting test case during a normal fuzzing process, and want
           to mutate it without rediscovering any of the test cases already
           found during an earlier run.

           To use this mode, you need to point -B to the fuzz_bitmap produced
           by an earlier run for the exact same binary... and that's it.

           I only used this once or twice to get variants of a particular
           file, so I'm not making this an official setting. */

        if (in_bitmap) FATAL("Multiple -B options not supported");

        in_bitmap = optarg;
        read_bitmap(in_bitmap);
        break;

      case 'C': /* crash mode */
        // 打开 crash exploration 模式
        if (crash_mode) FATAL("Multiple -C options not supported");
        crash_mode = FAULT_CRASH;
        break;

      case 'n': /* dumb mode */
        // 打开 dumb mode,即黑盒模式,不插桩
        if (dumb_mode) FATAL("Multiple -n options not supported");
        if (getenv("AFL_DUMB_FORKSRV")) dumb_mode = 2; else dumb_mode = 1;

        break;

      case 'T': /* banner */
        // UI 相关,换个 banner
        if (use_banner) FATAL("Multiple -T options not supported");
        use_banner = optarg;
        break;

      case 'Q': /* QEMU mode */
        // qemu 模式,暂且与我们无关
        if (qemu_mode) FATAL("Multiple -Q options not supported");
        qemu_mode = 1;

        if (!mem_limit_given) mem_limit = MEM_LIMIT_QEMU;

        break;

      case 'V': /* Show version number */

        /* Version number has been printed already, just quit. */
        exit(0);

      default:

        usage(argv[0]);

    }

  if (optind == argc || !in_dir || !out_dir) usage(argv[0]);
我们逐一分析输入参数。
-i in_dir:表示初始 corpus 目录。-o out_dir:表示工作目录。这里存放 fuzz 过程中的各种信息、当前的 corpus、crash 用例等。-M sync_id:表示以 master 身份运行。deterministic 变异会被打开。-S sync_id:表示以 slave 身份运行。deterministic 变异会被关闭。-f out_file:假如目标程序一定要从某个特定文件读入(例如/etc/nginx/nginx.conf),那我们可以用这个选项指定 AFL 把变异出的 input 写入那个文件。-x extras_dir:如果有 dictionary,可以用此选项提供给 AFL。-t exec_tmout:设置 exec timeout。-m ...:设置内存限制。-b cpu:绑定指定 cpu 核。-d:跳过 deterministic 变异阶段。-B:秘密选项,与 afl-tmin 的-B类似,让 fuzzer 只关心 shm 中的某些位置。-C:打开 crash exploration 模式。根据白皮书,此模式用于探索某个 crash 的潜力。输入一个 crash 用例,fuzzer 将生成很多 crash。-n:打开 dumb 模式(黑盒模式),不插桩运行。此模式下,目标程序不挂载 shm。若没有设置环境变量AFL_DUMB_FORKSRV,则也不使用 fork server。-T:给 ui 换个 banner。-Q:qemu 模式,暂且与我们无关。
处理完 argv 之后,fuzzer 便开始了初始化流程。逐行阅读:
  // 以下为 fuzz 循环开始前的准备工作

  // 设置一些信号的 handler,例如 alarm 响了就要关闭 child 进程
  setup_signal_handlers();
这个函数是用于设置几个 handler:
SIGHUP, SIGINT, SIGTERM:将全局变量stop_soon设为1,要求 fuzzer 尽早退出,并关掉 fork server 和 child。SIGALRM:如果 alarm 响了,若 child 进程在运行,则认为 child 进程超时,关掉它;若现在没有 child 进程,说明是 fuzzer 与 fork server 的通讯超时了,此时关掉 fork server。SIGWINCH:ui 相关。SIGUSR1:将全局变量skip_requested设为1。用户可以发送这个信号,来放弃对当前用例的变异,开始 fuzz 下一个用例。
继续往下看:
  // 检查 ASan 选项
  check_asan_opts();
这一行是检查 ASan 和 MSan 选项。如果用户设置了 ASAN_OPTIONS 环境变量,那就必须使用 abort_on_error=1 和 symbolize=0。若用户设置了 MSAN_OPTIONS 环境变量,那就必须设置 exit_codd=86 和 symbolize=0。
  // 检查 sync_id 字符串是否合法,并设置 sync_dir 和 out_dir
  if (sync_id) fix_up_sync();

  if (!strcmp(in_dir, out_dir))
    FATAL("Input and output directories can't be the same");

  if (dumb_mode) {
    if (crash_mode) FATAL("-C and -n are mutually exclusive");
    if (qemu_mode)  FATAL("-Q and -n are mutually exclusive");
  }
如果是并行模式,则检查 sync_id 串是否合法、并设置 sync_dir 和 out_dir。
out_dir 就是 -o 选项提供的工作目录。但在并行模式下,sync_dir 是工作目录, out_dir 则是工作目录下以 sync_id 为名的子文件夹。接下来,处理一些环境变量:
  // 按 env 设置一些全局变量
  if (getenv("AFL_NO_FORKSRV"))    no_forkserver    = 1;
  if (getenv("AFL_NO_CPU_RED"))    no_cpu_meter_red = 1;
  if (getenv("AFL_NO_ARITH"))      no_arith         = 1;
  if (getenv("AFL_SHUFFLE_QUEUE")) shuffle_queue    = 1;
  if (getenv("AFL_FAST_CAL"))      fast_cal         = 1;

  if (getenv("AFL_HANG_TMOUT")) {
    hang_tmout = atoi(getenv("AFL_HANG_TMOUT"));
    if (!hang_tmout) FATAL("Invalid value of AFL_HANG_TMOUT");
  }

  if (dumb_mode == 2 && no_forkserver)
    FATAL("AFL_DUMB_FORKSRV and AFL_NO_FORKSRV are mutually exclusive");

  // 设置 LD_PRELOAD
  if (getenv("AFL_PRELOAD")) {
    setenv("LD_PRELOAD", getenv("AFL_PRELOAD"), 1);
    setenv("DYLD_INSERT_LIBRARIES", getenv("AFL_PRELOAD"), 1);
  }

  if (getenv("AFL_LD_PRELOAD"))
    FATAL("Use AFL_PRELOAD instead of AFL_LD_PRELOAD");
可见,如果我们想要给程序添加 LD_PRELOAD,正确方式是设置 AFL_PRELOAD 环境变量。接下来是一些琐碎工作:
// 把 fuzzer 运行参数存进 orig_cmdline
save_cmdline(argc, argv);
// ui 相关
fix_up_banner(argv[optind]);
// 若有环境变量 AFL_NO_UI,则 not_on_tty = 1
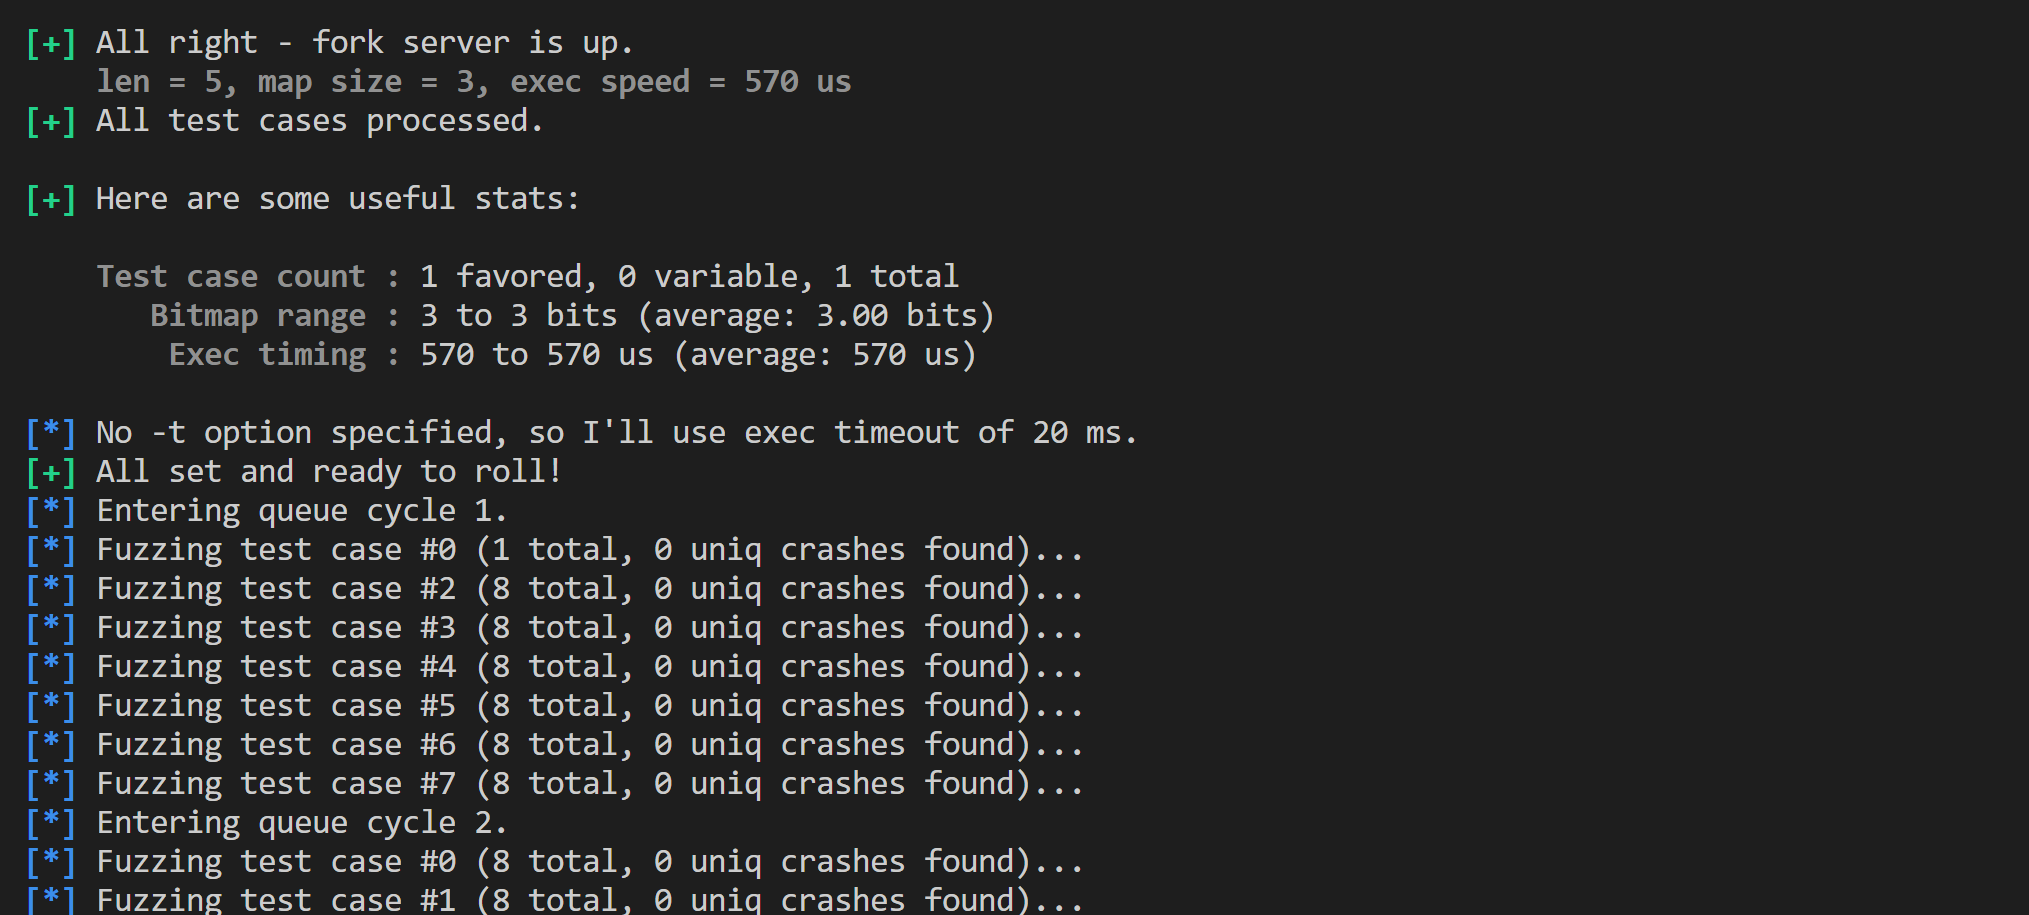
check_if_tty(); 由于 AFL 默认的 ui 会定期刷新,我们可以用 AFL_NO_UI 来让它不画 ui,而是逐行输出日志。效果如下图:
接着阅读代码。下面是和 cpu 相关的内容:
  // cpu 相关
  get_core_count();

  // linux 下 HAVE_AFFINITY=1,绑定到一个空闲 cpu 上
#ifdef HAVE_AFFINITY
  bind_to_free_cpu();
#endif /* HAVE_AFFINITY */

  // 如果 crash 掉的进程的崩溃报告会被发给某个程序,那么会引入延迟,于是 crash 可能会被误认为是超时
  // 检查系统配置 /proc/sys/kernel/core_pattern,如果是这种情况,提醒一下用户
  check_crash_handling();

  // 若发现 cpu 频率可调,则唆使用户把 cpu 定在最高频率
  check_cpu_governor();
fuzzer 检查系统的负载,把自己绑定到一个空闲 cpu 核心上。另外,若 cpu 频率可调,则建议用户将其定在最高频率。
如果进程 crash 后会报告给某个程序(例如 /usr/share/apport/apport ),这可能造成延迟,使得 fuzzer 误认为程序超时。AFL 会检查这种情况,并提醒用户。
  // 若指定了环境变量 AFL_POST_LIBRARY,则设置 post_handler 为 lib 中的 afl_postprocess 函数
  setup_post();
这里 setup_post 函数的功能是:若有环境变量 AFL_POST_LIBRARY ,则调用 dlopen 挂载这个 lib,将全局变量 post_handler 指向 lib 中的 afl_postprocess 函数。
post_handler 的签名是 u8* post_handler(u8* data, u32* len)。在 fuzzer 变异出一个新的用例、即将交给目标程序执行时,这个函数会被调用。所以,假如用户想要对 AFL 变异出的用例进行操作——例如将其记录到数据库中——就可以通过不修改 AFL 源码的方式实现。用户只需写一个
post_handler,编译成动态链接库,通过 AFL_POST_LIBRARY 告知 AFL。接下来,初始化 shm 和 16bit 查找表:
  // 初始化 shm,流程与 afl-tmin 类似。若处于 dumb 模式则不设置 __AFL_SHM_ID
  setup_shm();

  // 初始化 16bit 查找表(性能优化用途)
  init_count_class16();
我们在读 afl-tmin 代码的时候,看到了长度为 256 的 8bit 查找表。而这里的 16bit 查找表是为了进一步加速——afl-fuzz 的 classify_counts 函数比 afl-tmin 那个版本要更快。在 afl-tmin 中,是逐字节将 hit count 替换为桶 id;而在 afl-fuzz 中,是逐双字节替换,还使用了循环展开等其他优化技巧。每两个字节打包替换,可以省下一次访存开销;16bit 查找表的大小是 65536 字节,也可以装在 L2 缓存里面。这是一个非常用心的优化。
接下来是一些文件操作:
  // 在工作目录下创建一些文件夹,并打开一些 fd 备用,例如 /dev/urandom
  setup_dirs_fds();

  // 把初始 corpus 读入 queue
  read_testcases();

  // 读入自动生成的 extra(如果有)
  load_auto();

  // 把初始 corpus 复制到工作目录的 queue 文件夹下
  pivot_inputs();

  // 如果用户通过 -x 选项指定了 dictionary,则从那里导入 extra
  if (extras_dir) load_extras(extras_dir);

  // 若是 in-place resume(通过 "-i -" 选项指定),则继承上次 fuzz 的 exec_timeout
  if (!timeout_given) find_timeout();
上面的 read_testcases 是把初始语料集读进 queue 里。至于 queue 的结构,我们下一篇文章再分析,现在只需要知道它是链表。按照白皮书,AFL 运行过程中会自动找到一些 extra token(也可以直接用 -x 选项提供 dictionary),上面的代码把这些 extra token 都读进来。另外,把初始 corpus 里面的文件都复制到工作目录的 queue 文件夹(实际上是创建硬链接)。
  detect_file_args(argv + optind + 1);

  // 创建 .cur_input 文件并打开,设为 out_fd。接下来 fuzzer 要把变异出的 input 写进这里,由 child 读取
  if (!out_file) setup_stdio_file();

  // 检查目标程序,看找不找得到、在不在 /tmp 等。
  check_binary(argv[optind]);

  start_time = get_cur_time();

  if (qemu_mode)
    use_argv = get_qemu_argv(argv[0], argv + optind, argc - optind);
  else
    use_argv = argv + optind;

  // dry run
  perform_dry_run(use_argv);
上述代码会在工作目录下创建一个 .cur_input 文件,并将文件描述符写入全局变量 out_fd。在 fuzz 流程中,AFL 会把变异出来的用例写进这个文件,由 child 进程读取这个文件作为 input。这些都完成后,AFL 进行一次 dry run。我们过一会再深入研究 perform_dry_run 函数,现在先继续看下面的代码:
  // 精简队列
  cull_queue();

  // ui,展示一些信息
  show_init_stats();

  // 若是恢复之前的 fuzz,则找到该从队列的什么位置继续
  seek_to = find_start_position();

  // 更新 fuzzer_stats 文件
  write_stats_file(0, 0, 0);

  // 保存 auto extras
  save_auto();

  if (stop_soon) goto stop_fuzzing;

  // 下面开始 fuzz 循环
  /* Woop woop woop */
首先调用 cull_queue 精简队列。这个过程在白皮书中有描述,简而言之就是给 queue 中的用例打分,分为 favored 和 non-favored 两类。我们下篇文章再分析这个算法。
精简队列之后,更新 ui 信息和 fuzzer_stats 文件。这个文件以人类可读的方式记录了 fuzzer 的当前状态,并随着 fuzz 过程不断更新。如果我们想监控 fuzz 流程,只需要定期观测这个文件。
show_init_stats 函数不只是更新 ui。若没有指定 exec_timeout,它还会根据 dry run 结果,自动设置一个 timeout:- 若平均执行时间超过 50ms,则设为 avg * 2
- 否则,若平均执行时间超过 10ms,则设为 avg * 3
- 否则,设为 avg * 5
另有约束:
exec_tmout 不能低于 dry run 用例的最大耗时;不能超过 1s。 当这些流程都结束后,fuzzer 进入我们所熟知的循环,正式开始工作。下一篇文章将详细分析这个大循环。现在,我们来看刚刚出现过的 perform_dry_run 函数。
perform_dry_run 函数
afl-fuzz 的 dry run 比 afl-tmin 的 dry run 要复杂,因为它不是只运行目标程序一次,而是用 queue 中的所有用例跑一遍程序;另外,它使用了 fork server。在代码中,这种 dry run 称为「calibrate(校准)」。完整代码如下:
/* Perform dry run of all test cases to confirm that the app is working as
   expected. This is done only for the initial inputs, and only once. */

static void perform_dry_run(char** argv) {

  struct queue_entry* q = queue;
  u32 cal_failures = 0;
  u8* skip_crashes = getenv("AFL_SKIP_CRASHES");

  while (q) {
    // 遍历 queue 中的每一个用例

    u8* use_mem;
    u8  res;
    s32 fd;

    // 当前用例的文件名
    u8* fn = strrchr(q->fname, '/') + 1;

    ACTF("Attempting dry run with '%s'...", fn);

    // 把用例读进 use_mem
    fd = open(q->fname, O_RDONLY);
    if (fd < 0) PFATAL("Unable to open '%s'", q->fname);

    use_mem = ck_alloc_nozero(q->len);

    if (read(fd, use_mem, q->len) != q->len)
      FATAL("Short read from '%s'", q->fname);

    close(fd);

    // 运行程序
    res = calibrate_case(argv, q, use_mem, 0, 1);
    ck_free(use_mem);

    if (stop_soon) return;

    if (res == crash_mode || res == FAULT_NOBITS)
      SAYF(cGRA "    len = %u, map size = %u, exec speed = %llu us\n" cRST,
           q->len, q->bitmap_size, q->exec_us);

    switch (res) {

      case FAULT_NONE:
        // 若 shm 中有超过 100 个 id 被命中过,这其中却没有 >= 32768 的,说明 id 分布非常不均匀
        // 此时提醒用户用最新的 AFL 重新编译目标程序
        if (q == queue) check_map_coverage();


        // crash exploration 模式,该 crash 却没 crash
        if (crash_mode) FATAL("Test case '%s' does *NOT* crash", fn);

        break;

      case FAULT_TMOUT:

        if (timeout_given) {

          /* The -t nn+ syntax in the command line sets timeout_given to '2' and
             instructs afl-fuzz to tolerate but skip queue entries that time
             out. */
          // 若 argv 中,时间限制参数是 -t nn+,或 resume 模式,则容忍超时
          if (timeout_given > 1) {
            WARNF("Test case results in a timeout (skipping)");
            q->cal_failed = CAL_CHANCES;
            cal_failures++;
            break;
          }

          // 否则不容忍超时,直接退出
          SAYF("\n" cLRD "[-] " cRST
               "The program took more than %u ms to process one of the initial test cases.\n"
               "    Usually, the right thing to do is to relax the -t option - or to delete it\n"
               "    altogether and allow the fuzzer to auto-calibrate. That said, if you know\n"
               "    what you are doing and want to simply skip the unruly test cases, append\n"
               "    '+' at the end of the value passed to -t ('-t %u+').\n", exec_tmout,
               exec_tmout);

          FATAL("Test case '%s' results in a timeout", fn);

        } else {

          SAYF("\n" cLRD "[-] " cRST
               "The program took more than %u ms to process one of the initial test cases.\n"
               "    This is bad news; raising the limit with the -t option is possible, but\n"
               "    will probably make the fuzzing process extremely slow.\n\n"

               "    If this test case is just a fluke, the other option is to just avoid it\n"
               "    altogether, and find one that is less of a CPU hog.\n", exec_tmout);

          FATAL("Test case '%s' results in a timeout", fn);

        }

      case FAULT_CRASH:

        if (crash_mode) break;

        // skip_crashes 是 AFL_SKIP_CRASHES 环境变量指定的
        if (skip_crashes) {
          WARNF("Test case results in a crash (skipping)");
          q->cal_failed = CAL_CHANCES;
          cal_failures++;
          break;
        }

        if (mem_limit) {

          SAYF("\n" cLRD "[-] " cRST
               "Oops, the program crashed with one of the test cases provided. There are\n"
               "    several possible explanations:\n\n"

               "    - The test case causes known crashes under normal working conditions. If\n"
               "      so, please remove it. The fuzzer should be seeded with interesting\n"
               "      inputs - but not ones that cause an outright crash.\n\n"

               "    - The current memory limit (%s) is too low for this program, causing\n"
               "      it to die due to OOM when parsing valid files. To fix this, try\n"
               "      bumping it up with the -m setting in the command line. If in doubt,\n"
               "      try something along the lines of:\n\n"

               "      ( ulimit -Sv $[%llu << 10]; /path/to/binary [...] <testcase )\n\n"

               "      Tip: you can use http://jwilk.net/software/recidivm to quickly\n"
               "      estimate the required amount of virtual memory for the binary. Also,\n"
               "      if you are using ASAN, see %s/notes_for_asan.txt.\n\n"

               "    - Least likely, there is a horrible bug in the fuzzer. If other options\n"
               "      fail, poke <lcamtuf@coredump.cx> for troubleshooting tips.\n",
               DMS(mem_limit << 20), mem_limit - 1, doc_path);

        } else {

          SAYF("\n" cLRD "[-] " cRST
               "Oops, the program crashed with one of the test cases provided. There are\n"
               "    several possible explanations:\n\n"

               "    - The test case causes known crashes under normal working conditions. If\n"
               "      so, please remove it. The fuzzer should be seeded with interesting\n"
               "      inputs - but not ones that cause an outright crash.\n\n"
               "    - Least likely, there is a horrible bug in the fuzzer. If other options\n"
               "      fail, poke <lcamtuf@coredump.cx> for troubleshooting tips.\n");

        }

        FATAL("Test case '%s' results in a crash", fn);

      case FAULT_ERROR:

        FATAL("Unable to execute target application ('%s')", argv[0]);

      case FAULT_NOINST:

        FATAL("No instrumentation detected");

      case FAULT_NOBITS:

        useless_at_start++;

        if (!in_bitmap && !shuffle_queue)
          WARNF("No new instrumentation output, test case may be useless.");

        break;

    }

    // 该用例的行为有变动
    if (q->var_behavior) WARNF("Instrumentation output varies across runs.");

    q = q->next;

  }

  // 存在校准失败的用例
  if (cal_failures) {

    if (cal_failures == queued_paths)
      FATAL("All test cases time out%s, giving up!",
            skip_crashes ? " or crash" : "");

    WARNF("Skipped %u test cases (%0.02f%%) due to timeouts%s.", cal_failures,
          ((double)cal_failures) * 100 / queued_paths,
          skip_crashes ? " or crashes" : "");

    if (cal_failures * 5 > queued_paths)
      WARNF(cLRD "High percentage of rejected test cases, check settings!");

  }

  OKF("All test cases processed.");

}
简而言之,上述代码对于 queue 中的每一个用例,调用 calibrate_case 函数进行校准。用例会被运行多次(默认是 8 次,这个函数的具体细节我们下文讨论)。对于校准结果:
- 若 timeout 了,且
-t参数里面没有容忍超时、也不处于 resume 模式,则直接退出。 - 若 crash 了,则直接退出(除非有
AFL_SKIP_CRASHES环境变量)。 - 若无法执行目标程序,或目标程序没被插桩,则直接退出。
- 另外,若该用例多次运行的行为不一致,则向用户抱怨两句。
在执行完所有用例的校准之后,若存在校准失败的用例(例如超时或 crash 但被容忍),则向用户报告情况。
check_map_coverage() 以检查 bitmap 覆盖情况。若 bitmap 超过 100 个位置有 hit count,但 $[32768, 65536)$ 区间未被击中,说明各条边的 id 分布很不均匀(理想情况下,各条边的 id 应该在 $[0, 65536)$ 范围内均匀分布)。此时唆使用户采用最新版 AFL 重新插桩编译。 可见,perform_dry_run 函数本身的逻辑比较简单,我们接下来应当关注「校准用例」的函数 calibrate_case 。
calibrate_case 函数(校准用例)
根据注释,calibrate_case 函数的运行时机至少有两个:一是程序运行之初,用于校准初始 corpus;二是发现了新路径,将有趣的用例加入 queue 时。总结一句:进了 queue 的用例,都要被运行一遍calibrate_case 函数。其代码如下:
/* Calibrate a new test case. This is done when processing the input directory
   to warn about flaky or otherwise problematic test cases early on; and when
   new paths are discovered to detect variable behavior and so on. */

static u8 calibrate_case(char** argv, struct queue_entry* q, u8* use_mem,
                         u32 handicap, u8 from_queue) {

  static u8 first_trace[MAP_SIZE];

  u8  fault = 0, new_bits = 0, var_detected = 0, hnb = 0,
      first_run = (q->exec_cksum == 0);

  u64 start_us, stop_us;

  s32 old_sc = stage_cur, old_sm = stage_max;
  u32 use_tmout = exec_tmout;
  u8* old_sn = stage_name;

  /* Be a bit more generous about timeouts when resuming sessions, or when
     trying to calibrate already-added finds. This helps avoid trouble due
     to intermittent latency. */

  // 若是 resume 先前的 fuzz 过程,或这个用例并非初始 corpus,则多容忍一点超时
  if (!from_queue || resuming_fuzz)
    use_tmout = MAX(exec_tmout + CAL_TMOUT_ADD,
                    exec_tmout * CAL_TMOUT_PERC / 100);

  // 校准失败计数器
  q->cal_failed++;

  stage_name = "calibration";
  stage_max  = fast_cal ? 3 : CAL_CYCLES;   // 默认是 8

  /* Make sure the forkserver is up before we do anything, and let's not
     count its spin-up time toward binary calibration. */

  // 如果 fork server 没有准备好,就初始化 fork server
  if (dumb_mode != 1 && !no_forkserver && !forksrv_pid)
    init_forkserver(argv);

  if (q->exec_cksum) {
    // 若已经有过 checksum,则将 trace_bits 备份到局部静态变量 first_trace(因为 trace_bits 马上就要被改掉了)
    memcpy(first_trace, trace_bits, MAP_SIZE);

    // 更新 virgin_bits。返回值:1 = 仅 hit count 更新;2 = 出现了新的边
    hnb = has_new_bits(virgin_bits);
    if (hnb > new_bits) new_bits = hnb;
  }

  start_us = get_cur_time_us();

  // 多次执行用例
  for (stage_cur = 0; stage_cur < stage_max; stage_cur++) {

    u32 cksum;

    // 刷新 ui
    if (!first_run && !(stage_cur % stats_update_freq)) show_stats();

    // 把用例写入 .cur_input 文件
    write_to_testcase(use_mem, q->len);

    // 运行目标程序
    fault = run_target(argv, use_tmout);

    /* stop_soon is set by the handler for Ctrl+C. When it's pressed,
       we want to bail out quickly. */

    // 若处于 crash exploration 模式,则 crash_mode = 2 = FAULT_CRASH
    // 否则,crash_mode = 0 = FAULT_NONE
    // 因此,`fault != crash_mode` 的语义是「正常模式下 crash 了,或 crash mode 下没有 crash」
    if (stop_soon || fault != crash_mode) goto abort_calibration;

    // shm 没有命中记录,说明没插桩
    if (!dumb_mode && !stage_cur && !count_bytes(trace_bits)) {
      fault = FAULT_NOINST;
      goto abort_calibration;
    }

    // 计算本次执行路径的消息摘要
    cksum = hash32(trace_bits, MAP_SIZE, HASH_CONST);

    if (q->exec_cksum != cksum) {
      // 此时,要么这个用例从未执行过,要么这个用例多次执行的表现不一致

      // 更新 virgin_bits
      hnb = has_new_bits(virgin_bits);
      if (hnb > new_bits) new_bits = hnb;

      if (q->exec_cksum) {
        // 这个用例以前执行过,且这次执行与以前表现不一致
        u32 i;

        for (i = 0; i < MAP_SIZE; i++) {

          if (!var_bytes[i] && first_trace[i] != trace_bits[i]) {
            // 记录不一致的 hit count 位置,并把本用例的执行次数提升到 40 次
            var_bytes[i] = 1;
            stage_max    = CAL_CYCLES_LONG;
          }

        }

        var_detected = 1;
      } else {
        // 这是该用例首次执行,记录 checksum 到 queue entry 中
        q->exec_cksum = cksum;
        memcpy(first_trace, trace_bits, MAP_SIZE);

      }

    }

  }

  stop_us = get_cur_time_us();

  total_cal_us     += stop_us - start_us;
  total_cal_cycles += stage_max;

  /* OK, let's collect some stats about the performance of this test case.
     This is used for fuzzing air time calculations in calculate_score(). */

  // 更新 queue entry 信息
  q->exec_us     = (stop_us - start_us) / stage_max;
  q->bitmap_size = count_bytes(trace_bits);
  q->handicap    = handicap;
  q->cal_failed  = 0;

  total_bitmap_size += q->bitmap_size;
  total_bitmap_entries++;

  // 给这个用例打分,并更新 top_rated 指针数组
  update_bitmap_score(q);

  /* If this case didn't result in new output from the instrumentation, tell
     parent. This is a non-critical problem, but something to warn the user
     about. */

  // 如果这个用例没有产生新的本质不同的路径,则报告用户
  if (!dumb_mode && first_run && !fault && !new_bits) fault = FAULT_NOBITS;

abort_calibration:

  if (new_bits == 2 && !q->has_new_cov) {
    // 若发现了新的边,更新一些信息
    q->has_new_cov = 1;
    queued_with_cov++;
  }

  /* Mark variable paths. */

  if (var_detected) {
    // 若该用例多次运行的行为不一致,统计有多少个位置的 hit count 不一致
    var_byte_count = count_bytes(var_bytes);

    // 将这个 queue entry 标记为 var_behavior
    if (!q->var_behavior) {
      mark_as_variable(q);
      queued_variable++;
    }
  }

  // 退出 calibration 模式,恢复现场
  stage_name = old_sn;
  stage_cur  = old_sc;
  stage_max  = old_sm;

  // 刷新 ui
  if (!first_run) show_stats();

  return fault;

}
可见,校准过程是多次运行用例(默认是 8 次),统计各次运行的结果。
- 若 fork server 没有准备好,就调用
init_forkserver()初始化 fork server - 多次调用
run_target()运行目标程序,观察结果。若没有任何 hit count 命中,则认为程序未插桩,报告错误。 - 如果发现对某用例多次运行程序,其表现不一致,则将执行次数提升到 40 次,并更新
var_bytes[](这个全局变量表示 shm 中哪些位置存在不一致性)。另外,将 queue entry 的var_behavior标记设为1。 - 更新 queue entry 信息,例如将
exec_us字段设为校准过程中的执行时间均值。 - 给这个用例打分,并更新
top_rated指针数组。
这其中,我们要关心三个函数:一是刚刚提到的「打分」算法 update_bitmap_score();二是 fork server 的初始化函数 init_forkserver();三是执行目标程序的 run_target() 函数。
update_bitmap_score 函数(用例打分)
白皮书在 Culling the corpus 章节提到:当 fuzz 进行到后期,可能一些用例的边覆盖度,是它们祖先的边覆盖度的严格超集,因此可以考虑缩小 corpus,专注于这些超级用例(当然,其他用例不是被彻底放弃了,而是被以很大的概率忽略掉)。因此,AFL 倾向于找个 queue 中用例的子集,使得它们在覆盖所有已知边的同时尽可能小。这样的用例被认为是 favored 的。AFL 作者声称,这样形成的 favored 集合,比整个 corpus 可以小 5 到 10 倍。
然而,子集覆盖问题是 NP-完全的。AFL 必须保证速度,所以它采用了一个不准确但是很高速的算法:对于 shm 的每一个位置(这代表一条边),记录 top_rated 指针,指向 queue 中覆盖了这条边的、分数最小的那个用例。一个用例的分数等于 exec_us * len,即执行时间与文件大小的乘积。
现在,对于每一条已知的边,它都有一个偏爱的测试用例了。AFL 会在合适的时候,采用如下算法来确定 favored 用例集合:
- 维护「favored 用例」以及「已被 favored 用例覆盖的边」的集合,初始均为 $\varnothing$
- 找一个还没被 favored 用例覆盖到的边,将其偏爱的那个用例加入 favored 集合
- 用刚刚加入的那个用例更新「已被 favored 用例覆盖的边」集合
- 重复步骤 2~3,直到所有的已知边都被覆盖
有了这些知识,我们来读 update_bitmap_score 函数源码。
/* When we bump into a new path, we call this to see if the path appears
   more "favorable" than any of the existing ones. The purpose of the
   "favorables" is to have a minimal set of paths that trigger all the bits
   seen in the bitmap so far, and focus on fuzzing them at the expense of
   the rest.

   The first step of the process is to maintain a list of top_rated[] entries
   for every byte in the bitmap. We win that slot if there is no previous
   contender, or if the contender has a more favorable speed x size factor. */

static void update_bitmap_score(struct queue_entry* q) {

  u32 i;
  u64 fav_factor = q->exec_us * q->len;

  /* For every byte set in trace_bits[], see if there is a previous winner,
     and how it compares to us. */

  for (i = 0; i < MAP_SIZE; i++)

    if (trace_bits[i]) {

       if (top_rated[i]) {

         /* Faster-executing or smaller test cases are favored. */

         if (fav_factor > top_rated[i]->exec_us * top_rated[i]->len) continue;

         /* Looks like we're going to win. Decrease ref count for the
            previous winner, discard its trace_bits[] if necessary. */

         if (!--top_rated[i]->tc_ref) {
           ck_free(top_rated[i]->trace_mini);
           top_rated[i]->trace_mini = 0;
         }

       }

       /* Insert ourselves as the new winner. */

       top_rated[i] = q;
       q->tc_ref++;

       if (!q->trace_mini) {
         q->trace_mini = ck_alloc(MAP_SIZE >> 3);
         minimize_bits(q->trace_mini, trace_bits);
       }

       score_changed = 1;

     }

}
可见上述代码就是简单的擂台法。代码中有一个细节:每个 queue entry 里面保存着这个用例的 trace_mini,它的大小是 8192 字节,即 65536 bit。它是一个「缩小版」的 hit count 数组——只保存各个边是否被击中过,不关心击中次数。
显然,具体的「构建 favored 用例集合」这件事不是这个函数做的。这个函数只是做了一些前置的工作,更新各个边的偏爱用例,并设置 score_changed 标记。真正重新构建 favored 集合的算法,得等到下一篇文章再分析。
init_forkserver 函数
本站之前的文章详细分析过 main payload 汇编中的 fork server。它在程序的第一个入口点处停下,先往 fd 199 写入 4 个字节的 \x00,然后通过 read() 阻塞在那里,等待 supervisor (一般是 afl-fuzz)从 fd 198 发来指令。它一旦从 fd 198 读到 4 个字节(不管内容是什么),它就调用 fork() 启动 child 进程,并将子进程的 pid 写进 fd 199。接下来,调用 waitpid() 等待子进程结束,并将子进程的退出原因写进 fd 198。结束这些工作之后,再次等待 supervisor 发来指令,照此循环。
按照上面的分析,可以画出通讯协议图:

现在来阅读 init_forkserver 函数源码。
/* Spin up fork server (instrumented mode only). The idea is explained here:

   http://lcamtuf.blogspot.com/2014/10/fuzzing-binaries-without-execve.html

   In essence, the instrumentation allows us to skip execve(), and just keep
   cloning a stopped child. So, we just execute once, and then send commands
   through a pipe. The other part of this logic is in afl-as.h. */

EXP_ST void init_forkserver(char** argv) {

  static struct itimerval it;
  int st_pipe[2], ctl_pipe[2];
  int status;
  s32 rlen;

  ACTF("Spinning up the fork server...");

  // 写入 st_pipe[1] 的内容可以在 st_pipe[0] 读到。这个管道用于 fd 199,是 fork server -> supervisor 方向
  // 写入 ctl_pipe[1] 的内容可以在 ctl_pipe[0] 读到。这个管道用于 fd 198,是 supervisor -> fork server 方向
  if (pipe(st_pipe) || pipe(ctl_pipe)) PFATAL("pipe() failed");


  // fork 出一个进程,让它变成 fork server
  forksrv_pid = fork();

  if (forksrv_pid < 0) PFATAL("fork() failed");
创建了两个管道,一个用于 supervisor 向 fork server 发指令,另一个用于 fork server 回复信息。接下来,调用 fork() 创建一个子进程,让它变成 fork server。来看子进程是如何变成 fork server 的:
  if (!forksrv_pid) {
    // 子进程的代码

    struct rlimit r;

    /* Umpf. On OpenBSD, the default fd limit for root users is set to
       soft 128. Let's try to fix that... */
    // 针对 OpenBSD,修改 fd 上限为 200
    if (!getrlimit(RLIMIT_NOFILE, &r) && r.rlim_cur < FORKSRV_FD + 2) {
      r.rlim_cur = FORKSRV_FD + 2;
      setrlimit(RLIMIT_NOFILE, &r); /* Ignore errors */
    }

    if (mem_limit) {
      // 内存限制,默认 50MB
      r.rlim_max = r.rlim_cur = ((rlim_t)mem_limit) << 20;

      setrlimit(RLIMIT_AS, &r); /* Ignore errors */
    }

    /* Dumping cores is slow and can lead to anomalies if SIGKILL is delivered
       before the dump is complete. */

    // 把 core dump 大小上限设为 0,详见 https://man7.org/linux/man-pages/man5/core.5.html
    r.rlim_max = r.rlim_cur = 0;

    setrlimit(RLIMIT_CORE, &r); /* Ignore errors */

    /* Isolate the process and configure standard descriptors. If out_file is
       specified, stdin is /dev/null; otherwise, out_fd is cloned instead. */

    // 起一个新的进程组
    setsid();

    // 忽略 stdout 和 stderr
    dup2(dev_null_fd, 1);
    dup2(dev_null_fd, 2);

    if (out_file) {
      // 若目标程序从文件中读取输入,则忽略 stdin
      dup2(dev_null_fd, 0);
    } else {
      // 目标程序从 stdin 读输入,把 stdin 重定向到 .cur_input 文件
      dup2(out_fd, 0);
      close(out_fd);
    }

    /* Set up control and status pipes, close the unneeded original fds. */

    // fork server 写 st_pipe[1]、读 ctl_pipe[0]
    // 将 fd 198 重定向到 ctl_pipe[0] 以接收 supervisor 指令
    if (dup2(ctl_pipe[0], FORKSRV_FD) < 0) PFATAL("dup2() failed");
    // 将 fd 199 重定向到 st_pipe[1] 以向 supervisor 发送回复
    if (dup2(st_pipe[1], FORKSRV_FD + 1) < 0) PFATAL("dup2() failed");

    // 关掉没用的 fd,只保留 198、199
    close(ctl_pipe[0]);
    close(ctl_pipe[1]);
    close(st_pipe[0]);
    close(st_pipe[1]);

    // 这几个 fd 是从 afl-fuzz 进程遗传下来的,与 fork server 没关系,需要关掉
    close(out_dir_fd);
    close(dev_null_fd);
    close(dev_urandom_fd);
    close(fileno(plot_file));

    /* This should improve performance a bit, since it stops the linker from
       doing extra work post-fork(). */

    if (!getenv("LD_BIND_LAZY")) setenv("LD_BIND_NOW", "1", 0);

    /* Set sane defaults for ASAN if nothing else specified. */

    // 如果用户没有指定 ASAN_OPTIONS 和 MSAN_OPTIONS,那么自动指定选项
    setenv("ASAN_OPTIONS", "abort_on_error=1:"
                           "detect_leaks=0:"
                           "symbolize=0:"
                           "allocator_may_return_null=1", 0);

    /* MSAN is tricky, because it doesn't support abort_on_error=1 at this
       point. So, we do this in a very hacky way. */

    setenv("MSAN_OPTIONS", "exit_code=" STRINGIFY(MSAN_ERROR) ":"
                           "symbolize=0:"
                           "abort_on_error=1:"
                           "allocator_may_return_null=1:"
                           "msan_track_origins=0", 0);

    // 执行目标程序。它会在第一个入口点停下来,给 supervisor 发送 4 字节的 hello,并等待指令
    execv(target_path, argv);

    /* Use a distinctive bitmap signature to tell the parent about execv()
       falling through. */

    // 正常情况下执行不到这里。如果执行到这里,说明 execv 失败了
    *(u32*)trace_bits = EXEC_FAIL_SIG;
    exit(0);

  }
可见,子进程做的事情是:
- 把内存大小限制为 50MB、把 core dump 大小上限设为 0。
- 创建一个新的进程组。
- 关掉不用的 fd。
- 若目标程序从
stdin读入,则重定向到用例文件。 - 把 fd 198 重定向到接收 supervisor 发来消息的管道、把 fd 199 重定向到往 supervisor 回复信息的管道。
- 如果用户没有给出 ASan 和 MSan 的选项,则指定为默认值。
- 执行目标程序。目标程序会在第一个入口点停下来,往 fd 199 写四个字节的 hello 包。由于发送成功,目标程序会担任 fork server,等待 supervisor 发来的指令。
总结一句:子进程收拾一下现场,维护通讯管道,然后把自己 execv 成 fork server。接下来,看看父进程的代码:
  // 以下是父进程继续执行的代码


  /* Close the unneeded endpoints. */

  // supervisor 读 st_pipe[0]、写 ctl_pipe[1]

  // 关掉没用的管道
  close(ctl_pipe[0]);
  close(st_pipe[1]);

  fsrv_ctl_fd = ctl_pipe[1];
  fsrv_st_fd  = st_pipe[0];

  /* Wait for the fork server to come up, but don't wait too long. */

  // 设置定时器,等待 fork server 发来 4 字节的 hello 包
  it.it_value.tv_sec = ((exec_tmout * FORK_WAIT_MULT) / 1000);
  it.it_value.tv_usec = ((exec_tmout * FORK_WAIT_MULT) % 1000) * 1000;

  setitimer(ITIMER_REAL, &it, NULL);

  // 注意 read 是阻塞的,会等到 fork server 发来 hello 或者超时为止
  rlen = read(fsrv_st_fd, &status, 4);

  // 取消定时器
  it.it_value.tv_sec = 0;
  it.it_value.tv_usec = 0;

  setitimer(ITIMER_REAL, &it, NULL);

  /* If we have a four-byte "hello" message from the server, we're all set.
     Otherwise, try to figure out what went wrong. */

  // 读到 4 个字节,说明 fork server 成功启动
  if (rlen == 4) {
    OKF("All right - fork server is up.");
    return;
  }

  // 以下为错误处理

  // 全局变量 child_timed_out 由 SIGALRM handler 设置,要么 fork server 自己超时了,要么 child 超时了
  // 鉴于现在还没有让 fork server 启动 child,说明肯定是 fork server 本身超时
  if (child_timed_out)
    FATAL("Timeout while initializing fork server (adjusting -t may help)");

  // SIGALRM handler 里面会结束 fork server,所以这个 waitpid 会马上返回
  if (waitpid(forksrv_pid, &status, 0) <= 0)
    PFATAL("waitpid() failed");

  if (WIFSIGNALED(status)) {
    // 推测错误原因,并给用户提些建议,略
  }

  FATAL("Fork server handshake failed");

}
可见父进程会等待 fork server 发来 hello 包,若接收成功,则 fork server 成功启动,初始化完成;否则做一点错误处理。至此,我们读完了 init_forkserver 函数。
run_target 函数
阅读源码:
/* Execute target application, monitoring for timeouts. Return status
   information. The called program will update trace_bits[]. */

static u8 run_target(char** argv, u32 timeout) {

  static struct itimerval it;
  static u32 prev_timed_out = 0;
  static u64 exec_ms = 0;

  int status = 0;
  u32 tb4;

  child_timed_out = 0;

  /* After this memset, trace_bits[] are effectively volatile, so we
     must prevent any earlier operations from venturing into that
     territory. */

  // shm 写零
  memset(trace_bits, 0, MAP_SIZE);
  MEM_BARRIER();

  /* If we're running in "dumb" mode, we can't rely on the fork server
     logic compiled into the target program, so we will just keep calling
     execve(). There is a bit of code duplication between here and
     init_forkserver(), but c'est la vie. */

  if (dumb_mode == 1 || no_forkserver) {
    // dumb 模式,略
  } else {

    s32 res;

    /* In non-dumb mode, we have the fork server up and running, so simply
       tell it to have at it, and then read back PID. */

    // 要求 fork server 启动 child
    if ((res = write(fsrv_ctl_fd, &prev_timed_out, 4)) != 4) {

      if (stop_soon) return 0;
      RPFATAL(res, "Unable to request new process from fork server (OOM?)");

    }

    // 从 fork server 读 child pid
    if ((res = read(fsrv_st_fd, &child_pid, 4)) != 4) {

      if (stop_soon) return 0;
      RPFATAL(res, "Unable to request new process from fork server (OOM?)");

    }

    if (child_pid <= 0) FATAL("Fork server is misbehaving (OOM?)");

  }

  /* Configure timeout, as requested by user, then wait for child to terminate. */

  it.it_value.tv_sec = (timeout / 1000);
  it.it_value.tv_usec = (timeout % 1000) * 1000;

  // 设置定时器,若超时,则 SIGALRM handler 会给 child 发送 SIGKILL
  setitimer(ITIMER_REAL, &it, NULL);

  /* The SIGALRM handler simply kills the child_pid and sets child_timed_out. */

  if (dumb_mode == 1 || no_forkserver) {

    if (waitpid(child_pid, &status, 0) <= 0) PFATAL("waitpid() failed");

  } else {

    s32 res;

    // 从 fork server 读取 child 退出原因
    if ((res = read(fsrv_st_fd, &status, 4)) != 4) {

      if (stop_soon) return 0;
      RPFATAL(res, "Unable to communicate with fork server (OOM?)");

    }

  }

  if (!WIFSTOPPED(status)) child_pid = 0;

  // 计算 child 运行耗时
  getitimer(ITIMER_REAL, &it);
  exec_ms = (u64) timeout - (it.it_value.tv_sec * 1000 +
                             it.it_value.tv_usec / 1000);


  // 取消定时器
  it.it_value.tv_sec = 0;
  it.it_value.tv_usec = 0;

  setitimer(ITIMER_REAL, &it, NULL);

  total_execs++;

  /* Any subsequent operations on trace_bits must not be moved by the
     compiler below this point. Past this location, trace_bits[] behave
     very normally and do not have to be treated as volatile. */

  MEM_BARRIER();

  tb4 = *(u32*)trace_bits;

  // shm 分桶

#ifdef WORD_SIZE_64
  classify_counts((u64*)trace_bits);
#else
  classify_counts((u32*)trace_bits);
#endif /* ^WORD_SIZE_64 */

  prev_timed_out = child_timed_out;

  /* Report outcome to caller. */

  // 若 child 是非正常结束的
  if (WIFSIGNALED(status) && !stop_soon) {
    kill_signal = WTERMSIG(status);

    // 如果是被 SIGKILL 结束的,说明超时
    if (child_timed_out && kill_signal == SIGKILL) return FAULT_TMOUT;

    // 其他原因退出,说明 crash
    return FAULT_CRASH;

  }

  /* A somewhat nasty hack for MSAN, which doesn't support abort_on_error and
     must use a special exit code. */

  // 若 child 是 MSan 结束的,则报告 crash
  if (uses_asan && WEXITSTATUS(status) == MSAN_ERROR) {
    kill_signal = 0;
    return FAULT_CRASH;
  }

  if ((dumb_mode == 1 || no_forkserver) && tb4 == EXEC_FAIL_SIG)
    return FAULT_ERROR;

  /* It makes sense to account for the slowest units only if the testcase was run
  under the user defined timeout. */
  // 更新 slowest_exec_ms 信息
  if (!(timeout > exec_tmout) && (slowest_exec_ms < exec_ms)) {
    slowest_exec_ms = exec_ms;
  }

  return FAULT_NONE;

}
它做的事情如下:
- 把 shm 写零。
- 给 fork server 发四个字节,要求它启动一个 child。
- 从 fork server 读 child pid,以便在 child 超时之后关掉它。
- 从 fork server 读 child 的退出原因。
- 给 shm 分桶。
- 更新
slowest_exec_ms信息,并向调用者返回执行结果(child 进程是否 crash)。
run_target 函数中,child 一结束就立即执行的,而执行路径的 hash 却是由其他函数(例如前文中的 calibrate_case 函数)计算的。因此,如果不改写
run_target 函数,外界无法获得真实的 hit count,而只能看到分桶后的结果。 以上,我们阅读完了 afl-fuzz.c 中偏「工程」的部分——如何启动 fork server、如何让 fork server 启动子进程等。下一篇文章,我们将讨论偏「算法」的部分——queue 的相关逻辑、变异策略等。
AFL 在与 hit count 相关的代码中使用了很多优化技巧。由于 shm 长度有 65536 字节,且每执行一遍目标程序,就需要遍历几次 shm,因此提升效率是有必要的。举个例子,afl-fuzz 和我们之前讨论过的 afl-tmin 都有 classify_counts 函数,它们功能相同,但 afl-tmin 的写法比较朴素,而 afl-fuzz 版本的实现如下:
static inline void classify_counts(u64* mem) {
  u32 i = MAP_SIZE >> 3;

  while (i--) {
    /* Optimize for sparse bitmaps. */

    if (unlikely(*mem)) {
      u16* mem16 = (u16*)mem;

      mem16[0] = count_class_lookup16[mem16[0]];
      mem16[1] = count_class_lookup16[mem16[1]];
      mem16[2] = count_class_lookup16[mem16[2]];
      mem16[3] = count_class_lookup16[mem16[3]];

    }
    mem++;
  }
}
这里使用了三种优化:
- 不是逐字节改为桶 id,而是每 2 个字节打包,去查 65536 规模的查找表。
- 使用
unlikely(实际会被展开为__builtin_expect(!!(_x), 0))来优化分支预测。 - 循环展开。
阅读这样高度优化的代码,很有趣味,学习到许多优化技巧。另外,除了这样的底层优化以外,afl-fuzz 中还有很多细小的算法优化——例如上文中分析过的 update_bitmap_score 函数,提前计算了 trace_mini 而不是等到要用了再算;若产生了偏爱用例的变动,则将 score_changed 标记为 1,这样,等到 AFL 考虑重新构建 favored 用例集合时,如果发现 score_changed 仍然是 0,则显然不需要重新构建。